

A Step-by-Step Guide to Downloading MarkLogic Server
MarkLogic Server is a powerful NoSQL database platform that offers advanced features for storing, managing, and searching structured and unstructured data. If you’re looking to explore the capabilities of MarkLogic Server, this article will provide a step-by-step guide on downloading the server software. Let’s get started!
NOTE: Marklogic is free for the developer and can store 1 TB of data with Full-features, If you need the MarLogic server for Production you need to buy the Enterprise License.
Step 1: Visit the MarkLogic Website:
To begin, open your preferred web browser and navigate to the official MarkLogic website at https://www.marklogic.com.
System Requirement: Before downloading the Marklogic, you need to check the system prerequisite that is required for the MarkLogic server.
Step 2: Access the Download Page:
Once you’re on the MarkLogic website, click on the “Products” or “Downloads” section or you can simply click this download link. Look for the option to download MarkLogic Server and click on it.
Step 3: Select the Appropriate Version:
You’ll find different versions of the MarkLogic Server on the download page. Choose the version that suits your requirements and click on the download link.
Step 4: Choose Your Operating System:
Next, you’ll need to select your operating system. MarkLogic supports various operating systems such as Windows, macOS, and Linux. Click on the appropriate option for your system.
Step 5: Provide Your Information:
In order to download MarkLogic Server, you’ll usually be required to provide some information, such as your name, email address, and company name. Fill in the required fields accurately, as this information may be used for future communications or updates.
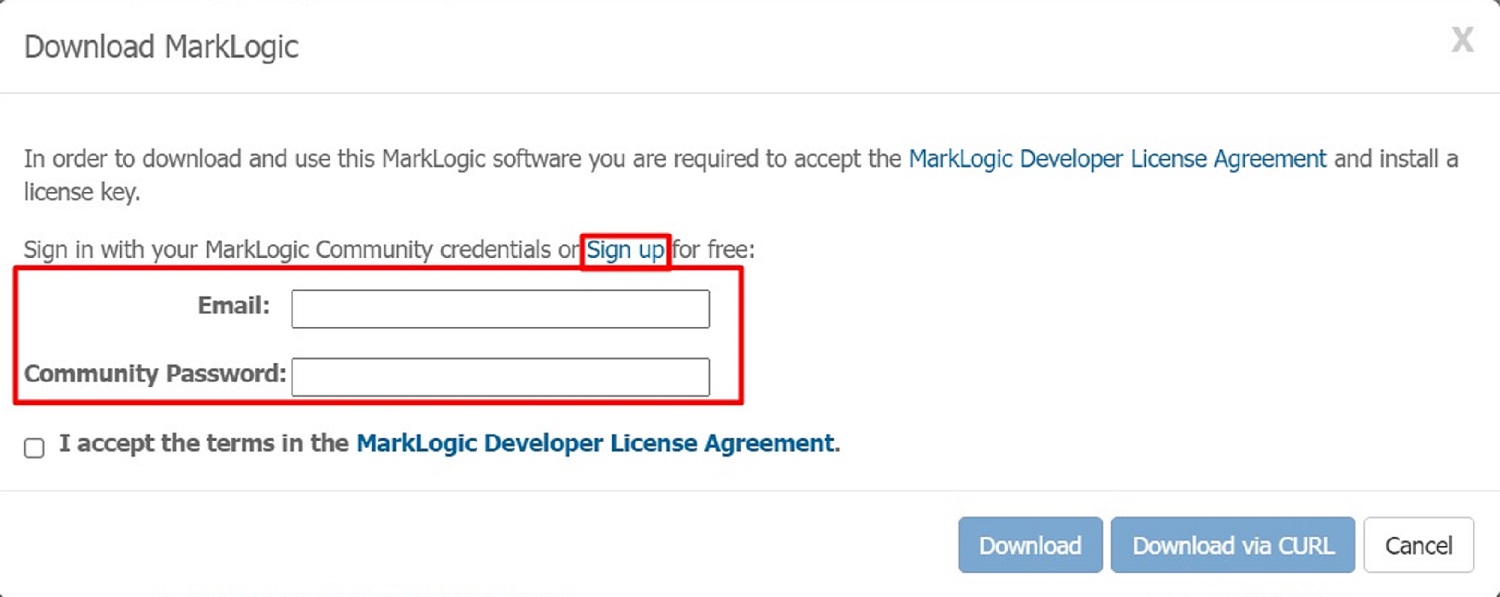
Step 6: Accept the License Agreement:
Before initiating the download, you will likely be presented with the MarkLogic Server license agreement. Take the time to review the terms and conditions. If you agree to the terms, click the checkbox indicating your acceptance and proceed.
Step 7: Start the Download:
After accepting the license agreement, click the download button to initiate the download process. The file will be saved to your computer or the specified location on your browser.
Step 8: Installation:
Once the download is complete, locate the downloaded file on your computer and run the installer. Follow the on-screen instructions provided by the installer to complete the installation process. Make sure to select the desired installation options, such as the installation directory and any additional components or features you wish to include.
Step 9: Start MarkLogic Server:
Once the installation is finished, you can start MarkLogic Server by the “Start MarkLogic Server” service on Windows. Once services have started, open your favorite browser and type the URL “localhost:8001”, where 8001 is the default port of the Marklogic admin UI.
For more detailed information, please follow this Marklogic installation link.