
When it comes to developing robust and efficient applications using MarkLogic, having a structured project setup is crucial. Gradle is a popular build automation tool that simplifies project configuration and dependency management. In this guide, we will walk you through the process of setting up a MarkLogic project with Gradle, allowing you to harness the power of MarkLogic’s NoSQL database while leveraging the flexibility and ease of use provided by Gradle.
Marklogi provides the best ml-gradle Gradle plugin which helps you to automate everything with MarkLogic. Here are many benefits of using the Marklogic ML gradle plugin.
- deploy an application
- add a host
- backup a database
- stub out a new project
- load modified modules
- run an MLCP or CoRB or Data Movement job
- etc.
So before starting the ML-Gradle plugin blow prerequisite needs to have on the system.
- Java 1.8
- MarkLogic 9 or later,
- Gradle 6 or later,
- Visual Studio Code Editor : (optional), you can use any editor you like but I recommend using VS Code as it has a number of plugins that help us speed up our development task.
So Before diving into the project setup, I’m assuming here you have installed the above prerequisite applications, if not.
Install the Java 1.8 version – Please refer the https://www.java.com/en/download/help/download_options.html
Install the Marklogic 9 or later version – Please refer to this article for the installation step.
Install the Gradle 6 – you need to ensure that Gradle is installed on your system. Visit the Gradle website and follow the installation instructions that are specific to your operating system. This will ensure you have the necessary tools to proceed.
Note: Currently, I’m using the latest version of Marklogic 11, Java 1.8, and Gradle 7.4.2. So all the below example has been tested on these combination applications.
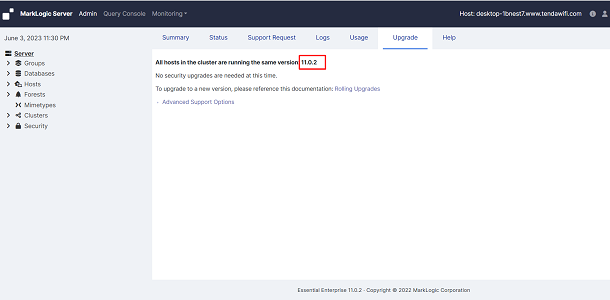
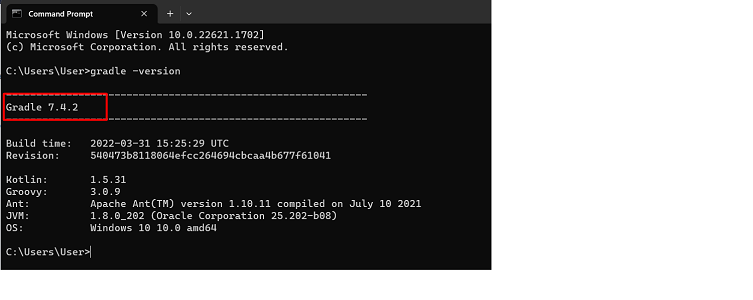
Table of Contents
ToggleA step-by-step guide to creating a new project with ML-gradle
Step-1:
Create a folder anywhere in your system in any directory, as here we are using the Windows machine so I’m creating a folder name “ML-First-project” in the “D:\Querymindtech\” folder drive.
Folder path: “D:\Querymindtech\ML-First-project“
Note: I’ll use now VS Code editor as recommended above, and will open this folder in the VS code.
Step-2:
Create a file “build.gradle” inside your folder D:\Querymindtech\ML-First-project, copy the below line of code, and save.
plugins {
id “com.marklogic.ml-gradle” version “4.5.2”
}
Open the terminal panel in VS code editor and select Command Prompt, run the below command:
gradle mlNewProject
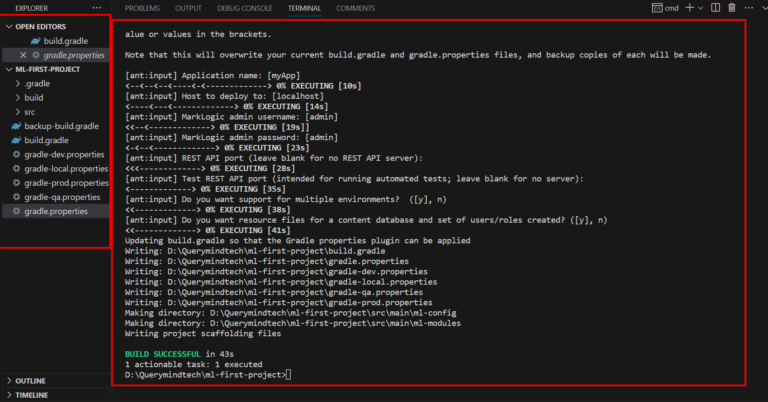
This starts a project wizard on your command prompt windows for your new application and would ask you to put your input:
- [ant:input] Application name: [myApp]
- Give any name for the Marklogic server which you want, if you do not want just press the enter it will put a default server name as “mlAppName : app” in the properties [gradle.properties] file.
- [ant:input] Host to deploy to: [localhost]
- Provide the system IP address where your Marklogic server has install, if it is in your local machine then you can just hit the enter, it will add Properties as “hostName: localhost“
- [ant:input] MarkLogic admin username: [admin]
- Provide admin username “mlUsername: admin“
- [ant:input] MarkLogic admin password: [admin]
- Provide password for admin user, “mlPassword: admin“
- [ant:input] REST API port (leave blank for no REST API server): Mandotary : 8056
- please provide the provide which is not used on Marklogic and nor for any other application in your system
- [ant:input] Test REST API port:
- (intended for running automated tests; leave blank for no server)
- [ant:input] Do you want support for multiple environments? ([y], n) : Y
- Provide Y If you want to add environment-specific properties
- [ant:input] Do you want resource files for a content database and a set of users/roles created? ([y], n) : Y
- Provide Y, It will add a resource file for the content database along with users’ roles.
Once this start wizard will be finished, you will see this screen output with a highlighted structure. It means Gradle has set up the project basis on your instruction.
You can verify the gradle.properties file and you will get the below properties inside this.
Now, Our setup is ready on the local directory, we just need to deploy this on the Marklogic server. So we will run the below command, below command will create an App server on Marklogic with port 8056 and would also create an associated database and forest.
gradle mlDeploy
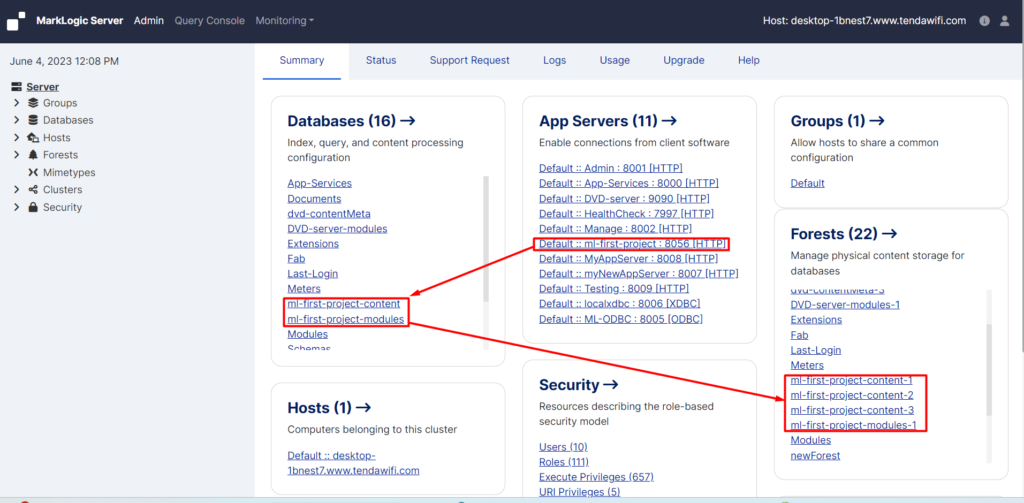
Now, open the admin UI page in the browser “localhost:8001” and you will get below the new app server with port 8056 and their associated database and forest.
Note, As you can see we have created some other properties also like gradle-prod.properties, gradle-dev.properties, and gradle-local.properties these are environments specific. because it is not necessary all properties would be same in all environments. So you can define the properties as per your environments and can deploy them.
Example: I want the above setup to deploy into dev environments but my dev properties are different so. So what will I Do, I will update the gradle-dev.properties file with the below properties and the below command.
mlAppName=ml-first-project
mlHost=10.120.57.57
mlUsername=admin
mlPassword=admin
mlRestPort=8056
Deploying an application
gradle mlDeploy -PenvironmentName=dev
So this is how you can create a NEW project with the Marklogic Gradle plugin and can use its features.
Undeploying an application
If you want to undeploy the same application from Marklogic, use the below command
gradle mlUndeploy -Pconfirm=true
Loading modules
So before deploying the modules into the module database, we need to understand the directory structure, below is the default directory structure that we used in general in the Marklogic project
/Youp-roject-folder/
/.gradle
/build
/src
build.gradle
gradle-dev.properties
gradle-local.properties
gradle-prod.properties
gradle-qa.properties
gradle.properties
Now below is the directory structure for the /src folder
/src/main
/ml-config
/ml-module
/root
/ext
/options
/services
/transforms
/namespaces
/rest-properties.json or /rest-properties.xml
/root – Any modules that aren’t namespaces, services, transformations, or parameters for REST APIs should be kept here. Rather than having “/root” in the URI, the module will be loaded with a URI relative to “/root”.
/ext – In the same way that “/root” can store any modules, so can this. What makes a difference? In fact, “/ext” was added first in an effort to mimic what the REST API’s /v1/ext endpoint recommends. However, in reality, it is simpler to simply place everything under “/root” because there is minimal benefit to keeping modules under “/ext.”
/options – Options for searching the REST API are kept here. The search options that are imported into ML are named using the file name (without the extension).
/services – Extensions for REST API resources are kept here. The resource extension is named using the filename (without the extension).
/transforms – Transforms from the REST API are kept here. The transform is given a name based on the file name (without the extension).
/namespaces – A file containing the namespace URI can be used to register a namespace for a REST API, and the name of the file—without the extension, which can be anything—is used as the namespace prefix.
/rest-properties.json or /rest-properties.xml – If either file is present, the REST properties endpoint is used to configure the REST API server connected to mlRestPort/mlTestRestPort.
Now you can create the module library as per mentioned bove structure and use below command for deploy the module code.
gradle mlLoadModules
ml-gradle tool has a number of pre-defined tasks, you need just to run these tasks as per your need.